


Build a Wood Q500 Fuselage

 12-12-2017 | 11:01 AM
#52
Thread Starter

Joined: Nov 2007
Posts: 2,060
Likes: 0
Received 0 Likes
on
0 Posts
From: Fritch,
TX
Dave,
Thanks for the "Seeker" design. It is one of my favorites.
These painted wood Q500s have come out very close to minimum weight and fly great.
My Sam-Rai winged model (based upon your fuselage and Sam-Rai style wing) won 1st on Sunday at the Mile-High Challenge at Littleton CO this past August.
Thanks for the "Seeker" design. It is one of my favorites.
These painted wood Q500s have come out very close to minimum weight and fly great.
My Sam-Rai winged model (based upon your fuselage and Sam-Rai style wing) won 1st on Sunday at the Mile-High Challenge at Littleton CO this past August.
06-10-2018 | 10:25 AM
#54
 06-11-2018 | 03:48 PM
#55
Thread Starter
Joined: Nov 2007
Posts: 2,060
Likes: 0
Received 0 Likes
on
0 Posts
From: Fritch,
TX
I use nylon bolts from either a hardware store or from online.
https://www.microfasteners.com/home.php?cat=760
https://www.microfasteners.com/home.php?cat=760
09-21-2018 | 02:46 AM
#57
10-19-2018 | 12:48 PM
#60
Senior Member
Hi Rodney
Yes my seeker plan measures about 1/16 under size but the kits built to the correct dimension. 73 mm is the correct size also for F3R also.
Are you going to give Q500 pylon ago? which class, sport or F3R?
Will you be cutting wing cores for the seeker?( 66012)
Geoff
Yes my seeker plan measures about 1/16 under size but the kits built to the correct dimension. 73 mm is the correct size also for F3R also.
Are you going to give Q500 pylon ago? which class, sport or F3R?
Will you be cutting wing cores for the seeker?( 66012)
Geoff
11-27-2018 | 03:53 AM
#61
Hi,
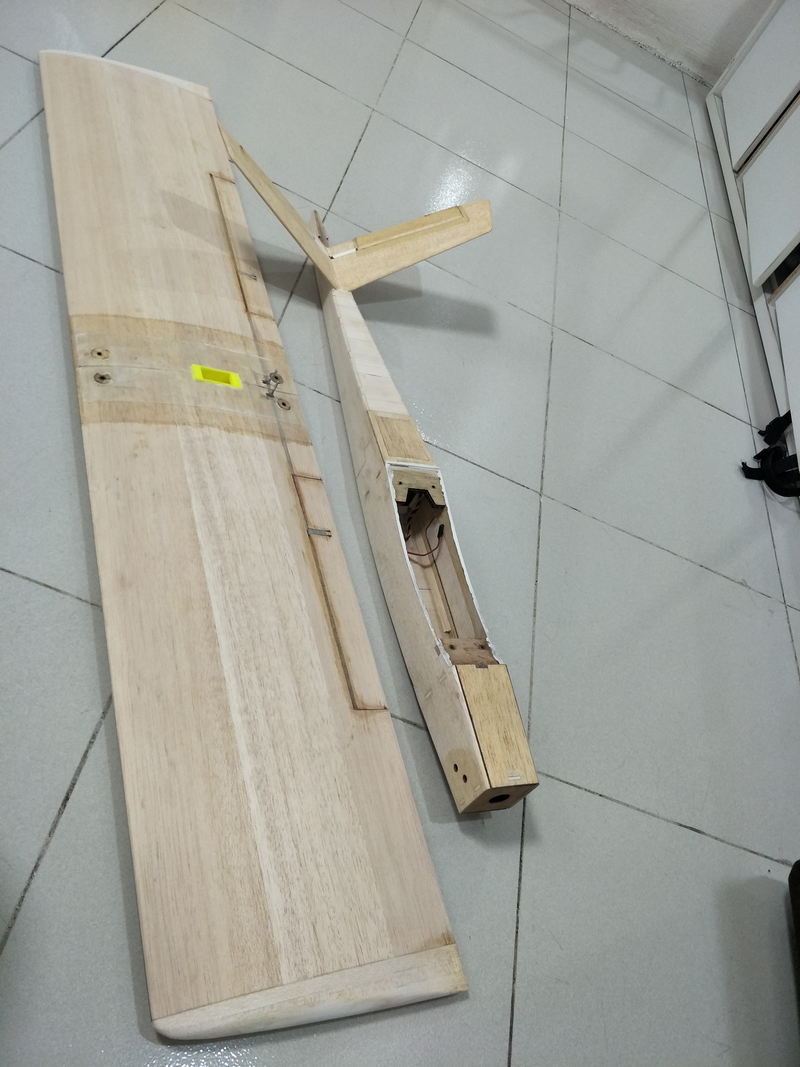
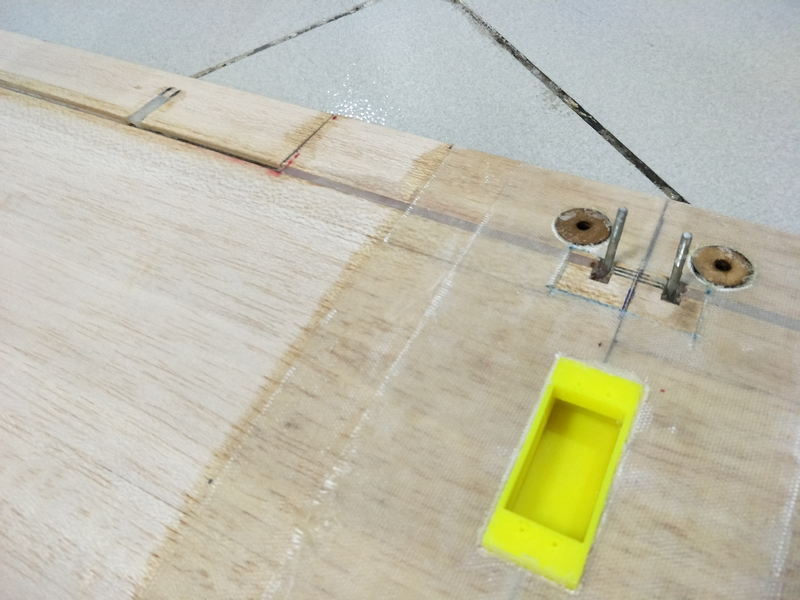
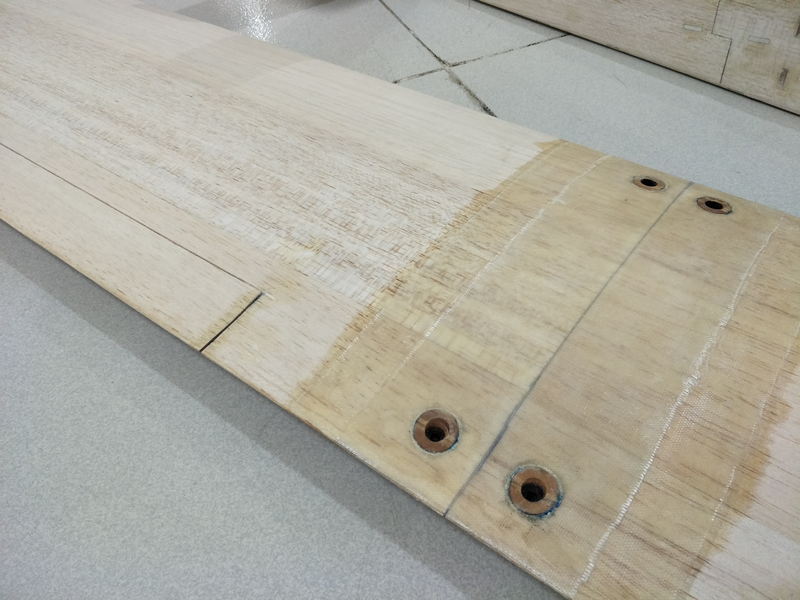
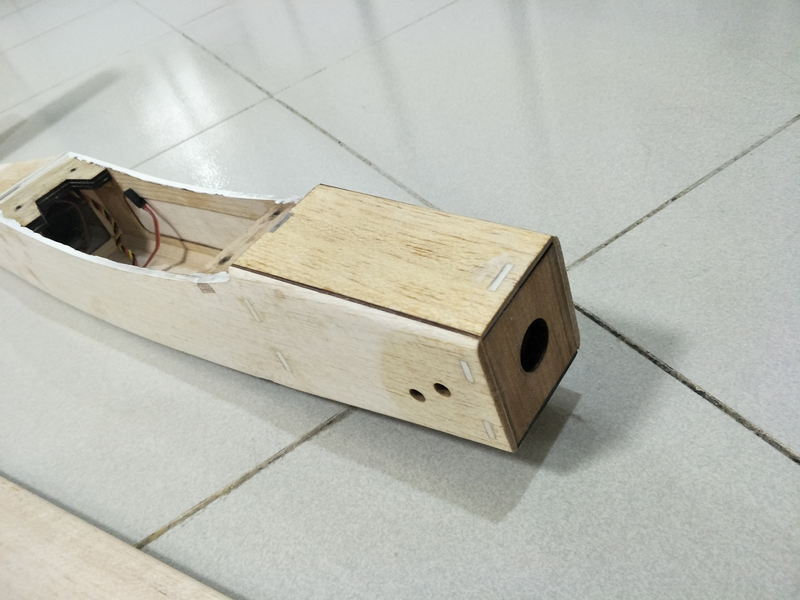
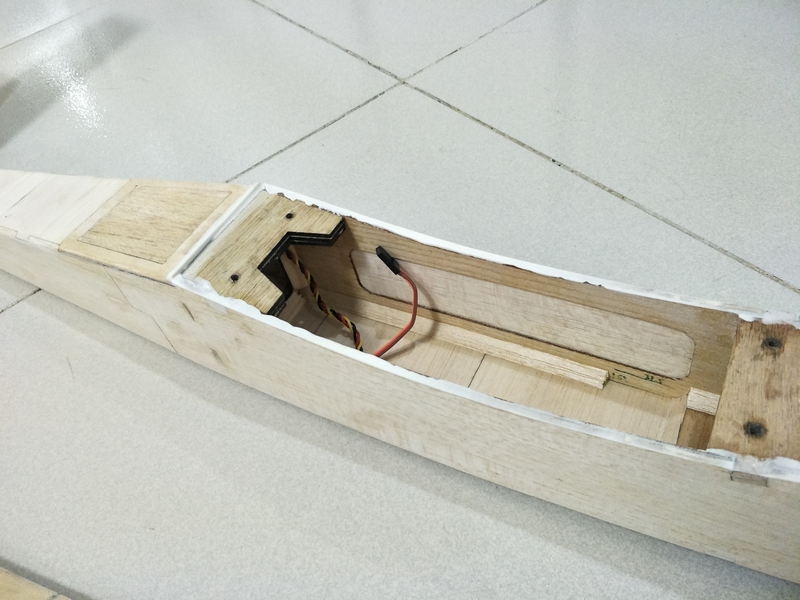
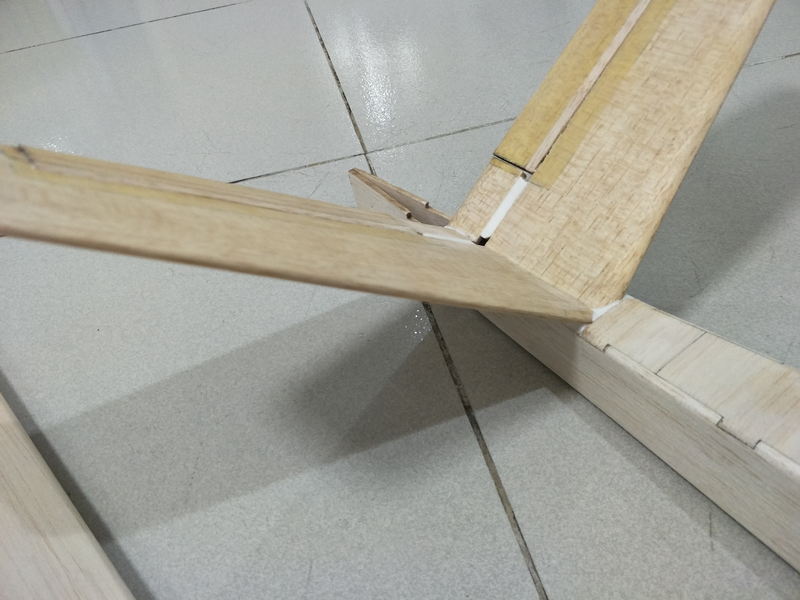
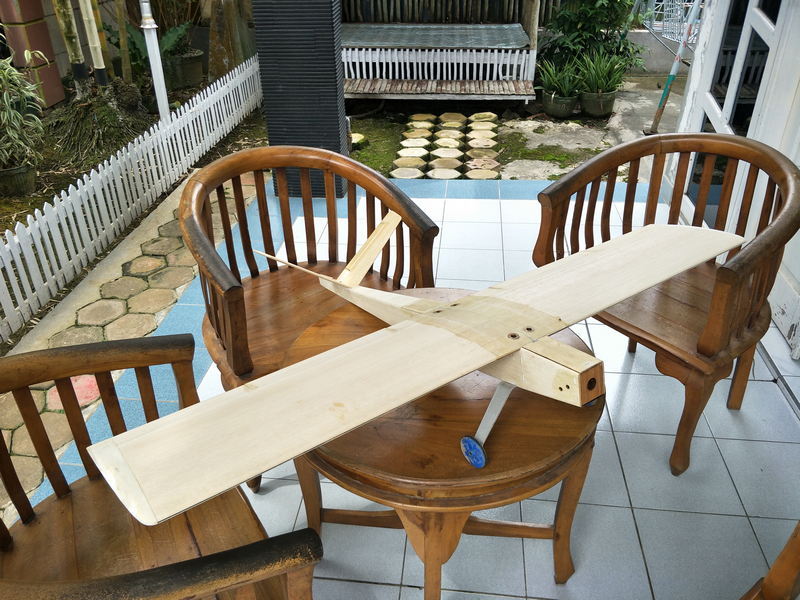
Finally got one ready for upcoming race. Our rule allowed for 1 inch wing, i thought it changed to new rule that it must be 30mm and I finished one seeker, turns out this coming race still uses our 2013 rule
Not much documentation as the method is very similar to whats already posted here, except I 3D printed wing servo tray, moved the V-tail 1/2 inch forward since the mechanics were rubbing too much with body.
Covering was using regular heat activated plastic covering, our rule does not allow fiberglass to be except for wing joiner.
I think i must insert some kind of wood spar next time to stiffen the wing some more.
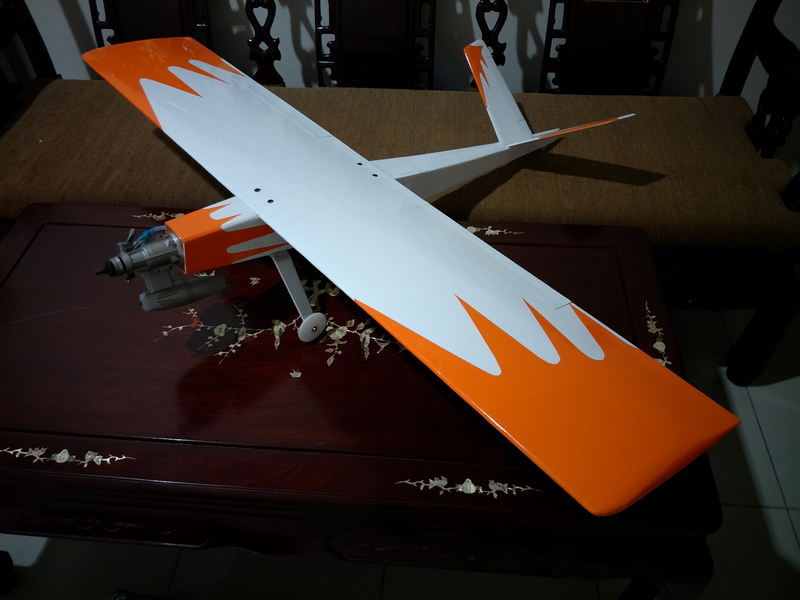
A friend did the covering for me, I get to pick the color, he get to do what ever he likes with it LOL.
Finally got one ready for upcoming race. Our rule allowed for 1 inch wing, i thought it changed to new rule that it must be 30mm and I finished one seeker, turns out this coming race still uses our 2013 rule
Not much documentation as the method is very similar to whats already posted here, except I 3D printed wing servo tray, moved the V-tail 1/2 inch forward since the mechanics were rubbing too much with body.
Covering was using regular heat activated plastic covering, our rule does not allow fiberglass to be except for wing joiner.
I think i must insert some kind of wood spar next time to stiffen the wing some more.
A friend did the covering for me, I get to pick the color, he get to do what ever he likes with it LOL.
12-08-2018 | 04:25 PM
#63
Seems no one flying pylon anymore 
I got 2nd place at last week regional championship that paves the road for national champs here, not good enough with my flying to secure the place
The plane is faster than the competition that still use old regulation which is 1 inch wing, however, I must have something wrongly setup, incidences, throws etc.
Its a handfull to fly with strong gusty crosswind. Pitching up in turns is severe when facing headwind in turning.
If anyone can share the setup it will be awesome
12-13-2018 | 06:21 AM
#65
Joined: Sep 2004
Posts: 273
Likes: 0
Received 0 Likes
on
0 Posts
From: Calgary,
AB, CANADA
Whiskey 29
For the pitching up on a turn, check lateral balance. The plane as a minimum should balance evenly left to right, most planes need a heavier left wing to offset the weight of the muffler of a Jett or Nelson engine.
Once the lateral balance has been made even, test fly the plane and if still pitching up in a turn, add some more weight (on the CG) to the tip of the left panel, test fly again, repeat until you are happy with results. For weight tape a coin to the tip location. Once happy with the lateral balance weigh what you have added, remove and drill a hole in the wing and add permanent weight (often epoxy with lead shot).
There used to be (several years ago, but still relevant) a speed secrets posting by Dave Norman (designer of the Seeker) either here or in another site that covered a lot of tips for Q500 racing.
12-13-2018 | 06:32 AM
#66
Joined: Sep 2004
Posts: 273
Likes: 0
Received 0 Likes
on
0 Posts
From: Calgary,
AB, CANADA
Check out this posting here on RC Universe for a discussion on how to set up a Q500.
http://www.rcuniverse.com/forum/gene...hlight=secrets
http://www.rcuniverse.com/forum/gene...hlight=secrets
12-14-2018 | 03:29 PM
#68
Ahh thank you for the replies
I did add some weight on the wing tip to balance the plane,
so it should be heavier on the left ?
Thanks for the link, I will have to try it this sunday.
I will have to re-measure the incidences.....
I did add some weight on the wing tip to balance the plane,
so it should be heavier on the left ?
Thanks for the link, I will have to try it this sunday.
I will have to re-measure the incidences.....
Last edited by whiskey29; 12-14-2018 at 03:32 PM.
12-15-2018 | 08:24 AM
#69
Joined: Sep 2004
Posts: 273
Likes: 0
Received 0 Likes
on
0 Posts
From: Calgary,
AB, CANADA
In order to stop the plane from pitching up in a left hand turn you may have to make the left panel slightly heavier. Test fly, simulate a turn at number one, see what happens, if pitching up add a weight and try again, until the pitch up stops. Of course as you adjust for pitch up adding weight may affect other trim settings and these will need to be adjusted as well.
I am not an expert, but I do know the best pilots seem to have a airplane that flies a Pylon course with small amounts of pilot input, pilots that struggle often need to fly the plane every bit of the course. Trimming and balance plays a big part in ones success.
I added a link for Dave Norman’s Speed secrets #1, I think there are several others as well, that would be worth a read.... good luck.
01-09-2019 | 04:55 PM
#70
OMG, I thought I have posted a reply last year.... It didnt send correctly..
Any way thanks for the Dave Norman's thing, I recalled I have read them before, and just aware of it again after you mentioned it
I will have to try a few things out then, first I need to re-measure the incidences.....
I suspect the tail does not seat properly now, however it will require a major surgery
04-24-2025 | 05:43 PM
#71
6 years since last post here
my seeker meet its demise after colliding with small bird flock at turn 1. Wing got separated, recovered the wing, lost the fuselage, it flew away like an artillery shell !!
The FG reinforcement in the LE keeps it intact, just a very slightly visible ding.


my seeker meet its demise after colliding with small bird flock at turn 1. Wing got separated, recovered the wing, lost the fuselage, it flew away like an artillery shell !!
The FG reinforcement in the LE keeps it intact, just a very slightly visible ding.
10-11-2025 | 08:52 PM
#72
Junior Member
Joined: Oct 2025
Posts: 1
Likes: 0
Received 0 Likes
on
0 Posts
6 years since last post here
my seeker meet its demise after colliding with small bird flock at turn 1. Wing got separated, recovered the wing, lost the fuselage, it flew away like an artillery shell !!
The FG reinforcement in the LE keeps it intact, just a very slightly visible ding.
my seeker meet its demise after colliding with small bird flock at turn 1. Wing got separated, recovered the wing, lost the fuselage, it flew away like an artillery shell !!
The FG reinforcement in the LE keeps it intact, just a very slightly visible ding.
Me and the boys at the club are having a q500 build off challenge - just for the fun of it� the seeker was my favourite. Could only find the PDF version on OuterZone and the dxf version seems to have been lost in time� did you build off the dxf version by at chance? If so, could you share?


